Uncategorized

De-Icing Your Roof And Gutters

With winter in full swing and the holiday season upon us, the last thing most of us are considering is the status of our roof.

Unfortunately, despite the fact that so many other things seem to take center stage at this time of year, it’s essential to provide necessary care and maintenance of your roof at such a critical time. For many of us, especially those who live in areas of the United States where winter weather conditions are severe, this is the time of year when a build up of snow or an ice dam can cause serious and significant damage.

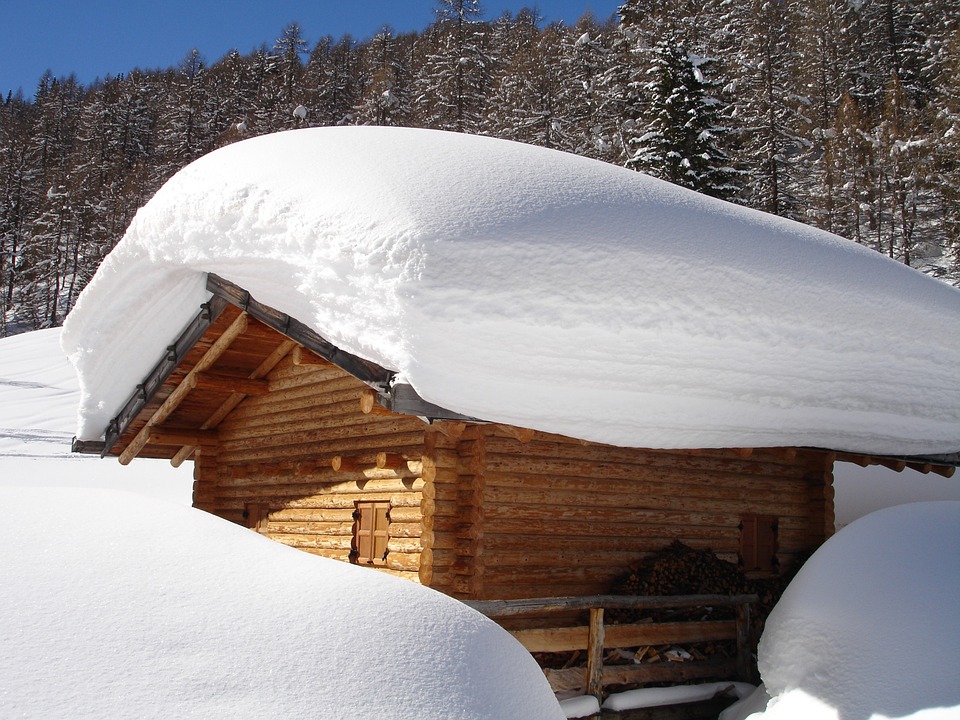
A typical roof is designed to hold up to 20 pounds per square foot, and a single cubic foot of snow can weigh as much as 15 pounds. This means that your roof may be strained beyond it’s limitations during a heavy snowfall or following a period of accumulating snow and ice. While these measurements vary depending on your roof’s specific pitch, materials, and structural integrity among other factors, it is always a good idea to remove excess snow and ice from your roof and gutter system.

There are a number of common ways to achieve this task, and each has it’s own benefits and drawbacks. The first consideration, however, is whether you are prepared to tackle the process on your own. As with all roof repairs and maintenance, there is a definite risk in performing the work yourself – and with icy and slippery conditions, this risk is even more exaggerated. If you are inexperienced, or otherwise uncomfortable with doing the job on your own, consider hiring a professional – they are trained to perform the task efficiently, correctly, and most importantly safely.

If you do decide to go the DIY route, then you’ll need to decide which method is most appropriate for your situation. Here are some common options explained:

Heat Cables

Heat cables are intended as a preventative measure. They are most effective in situations where the roof is poorly insulated, such as over a porch or garage, or even in the gutters. These cables use electricity to produce warmth, melting the snow and ice before it is able to build up. They will not heat large areas effectively, nor are they able to melt an already existing ice dam.

Snow Rake

A snow rake, also called a roof rake, is essentially a shovel with a long handle, used to manually remove snow and light ice build up from your roof. While it is perhaps the least expensive solution, it will require you to be vigilant in getting outside and removing the snow following each and every storm – and some times this can be a rather labor intensive task.

Chemical Solutions

If you decide to use a chemical de-icer, first be sure the product is intended for use on your roof. Calcium Chloride Tablets (often called roof-melt tablets) use a chemical reaction to safely melt snow and ice. Look for a product that indicates it will prevent build up. While these are safe to use on walkways as well, some common salt products for ground use will damage your roof. Some chemical solutions are also toxic, so consider if this is a solution that is appropriate for you, and be careful when choosing your product.

Major Changes

Lastly, there is the option to consider making more permanent changes to your roof to reduce the potential for damaging ice and snow buildup. These options include roof sealants to prevent water leaking inside, increasing the steepness of the incline when replacing your roof, or metal shingles to provide less traction for snow and ice to remain on the roof. For these options, you’ll need to contact a roofing contractor.
Uncategorized

Winter Roofing Problems And Solutions

If you live in an area where freezing temperatures, snow, or ice can occur, you’re probably no stranger to the hassles of winter weather. Winter weather conditions affect every aspect of our lives in some way or another, and unfortunately, there is no exception when it comes to roofing concerns. The following article is a a breakdown of some of the most common problems homeowners face in winter, and what you can do about them.

Problem #1: Heavy Snow

When snow begins to accumulate on your roof, it’s important to take action. Snow and ice can add extra weight to your roof that’s greater than your roof was designed for. If that extra weight remains in place for too long, your roof may become damaged and allow water to seep in. Many people choose to purchase a roof rake – which is exactly what it sounds like. From your position on the ground, you can use the long pole with a flat end to scrape the snow off your roof. The more snow (and the more roof) you have, the more physically demanding the task will be, but it’s ideal for the homeowner who is up for it and wants to save money. Another popular option is to have de-icing cables installed which will melt the snow and ice automatically.

Problem #2: Flashing Leaks

Flashing is the most common location for a roof leak to occur. High winds, ice, and other harsh weather can cause the flashing to pull free or be blown away, leaving your roof structure exposed to the elements and allowing water to enter your home. Be sure to have a thorough inspection done before winter and replace an damaged or missing flashing to avoid a problem once winter arrives.

Problem #3: Ice Dams

When the temperature at the uppermost portion of your roof is above freezing, and the lower portions are below freezing, water will melt and run down the roof, re-freezing at the roof’s edge and gutters, creating what’s known as an ice dam. This water can freeze under the shingles as well, creating the potential for even more damage. As the warmer water pools up behind the ice dam, it can enter your home and cause water damage. To lessen the chances of having an ice dam, be sure your roof is properly ventilated, insulated, and frequently cleared after snow falls.

Problem #4: Icicles

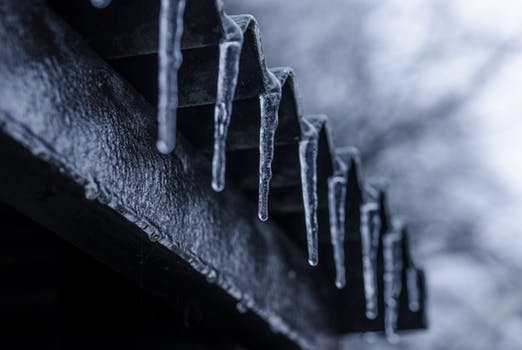
Icicles go hand in hand with ice dams, since they are both caused by the same conditions. Clogged gutters and downspouts or ice dams provide a perfect place for thawing water to re-freeze. The added weight can cause damage to gutters and be a hazard to people and animals. Keep your roof as clear as possible, and ensure there is no debris like leaves or twigs in the gutters. Remove icicles if possible. De-icing cables can also help to prevent this issue.

Remember it is always best to consult a professional if you have an emergency situation or need help determining how to handle an issue.

Uncategorized

Preparing Your Roof This Fall

As the days get shorter and cooler, the leaves begin to change, and the kids return to school for the year, it’s time to begin preparing for the wetter weather that’s right around the corner, to ensure your family stays safe and warm all winter long. Here are a few tips for preparing your roof this fall.

Clean The Gutters

Your gutters are a vital part of your roofing sytem. If leaves and other debris are allowed to build up, the downspouts can become clogged and hinder drainage. Not only does this mean they can overflow and cause damage to your roof, trim, and siding, but additionally the gutters can become too heavy from the weight of the wet debris and begin to pull free and break off. This is especially true in regions where snow and ice buildup is a concern. A thorough cleaning to remove the debris is essential and gutter screens can be beneficial for long term ease of maintenance.

Clear The Roof

Leaves, twigs, pine needles, and other such debris present a problem if allowed to remain on your roof surface as well. These can hold in moisture, leading to rot or mold, causing your roofing material to break down over time. Sweep or blow off the debris that has accumulated on your roof, especially in the valleys where your roof most needs a clear path for water to flow.

Trim The Trees

Tree limbs and branches that overhang your roof will shed leaves in the fall, clogging your gutters continuously if not properly maintained. High winds, and the added weight of ice or snow can cause these branches to break and damage your roof as well. Trim back any branches that might cause an unexpected and expensive repair during the winter months.

Check For Damage

Now that your roof is clear, it’s a great time to take a look at the overall condition of your roof and shingles. If climbing up to get a first hand look isn’t something you are comfortable with, grab a pair of binoculars to make and inspection from the ground. You’ll want to look for any missing or damaged shingles, or damaged flashing around vents, chimneys, or skylights, since these areas are most likely to be the source of a leak. Also scan the fascia boards and soffits for damage, to ensure they won’t let in water under the roof line.

Don’t Forget The Attic

Head up into the attic to take a look at the roof from the inside. If there are any spots where you can see sunlight coming through, this means water can come through as well, so you’ll need to make repairs right away. Check for any signs of mold or mildew – these will lead to a number of problems if left untreated, such as causing damage to the timbers, and can be a major health hazard within your home. Ensure your attic has proper airflow and insulation to eliminate moisture problems from condensation, as well as maintain optimum energy efficiency.

Hire A Professional

While there are many smaller problems you may be able to tackle on your own if you are a handy homeowner, there is no better option than to call in a roofing expert to perform a yearly inspection or make any major repairs. Their experienced eye will easily spot things you might have missed and the additional cost will be offset by avoiding any costly and life-disrupting repairs, as well as prolonging the life expectancy of your roofing system.


Uncategorized

Choosing The Right Roofing Contractor

When disaster strikes in the form of a storm-damaged roof, or a small problem is about to become a big one, and even when it’s just the right time for an upgrade, every homeowner who needs to install or repair a roof faces the same problem first: how to choose the right roofing contractor. You need the job done quickly an efficiently, but done well. Here is some advice to help you choose a contractor who is knowledgeable, experienced, trustworthy, and professional.

1. Get local referrals. A local contractor will be familiar with your community’s rules and code regulations, and have a relationship with your local crews and suppliers. This can increase the chance that the job will be finished in a timely fashion with no unexpected delays or unforeseen problems. Ask friends, family, neighbors, and co-workers whom they have used in the past and whether they were satisfied with the process. Use review sites and social media for an even wider reflection of customer satisfaction once you have a few in mind.

2. Get multiple (at least 3) estimates. Before allowing anyone to come to your home, be sure to ask if there is any charge for an estimate. Treat this step the same as you would when getting an auto repair estimate. Be wary of a bid that is not in a similar range to other estimates. A bid that is too low might reflect poor quality workmanship or inferior materials, or might simply mean the contractor has access to good quality materials at a lower price. Don’t be afraid to ask if the price seems too good to be true.

3. Verify that the contractor has the roper licensing and insurance. The contractor’s insurance should cover all employees and subcontractors, and they should be able to provide a copy of their insurance certificate for validation. Most states require licensing for contractors. If this is the case in your state, make sure your contractor provides you with a copy of their license and confirm their status online.

4. Ask for a list of references, such as past clients, so you can call them and confirm that they were satisfied with their experience. You can also contact your state’s Department of Professional Regulation or a local Better Business Bureau (BBB).

5. Spend some time talking with the contractor to be sure the fit “feels” right. Use this time to ask questions about their experience, the length of time they have been in business, and any questions pertaining to your job in particular you may have. Good communication and understanding is essential to ensuring the process goes smoothly.

6. Don’t allow anyone to pressure you into a contract. If it doesn’t feel right, seek another contractor for comparison before making a final decision.

7. Ask for a written estimate and contract. Be sure it contains information regarding the length of the project, daily start and end times, materials to be used, safety procedures, the total bill and payment schedule, and clean-up methods. Be sure to read the warranty and ask any questions you may have, including any actions or exceptions that may void the warranty. Be sure the contract is clear, covers all relevant information, and signed by both parties before allowing work to begin.


Uncategorized

Benefits of Installing a New Roof

Many homeowners will not consider replacing their roof unless it is absolutely necessary. The cost can be prohibitive to many, and the process, like many other types of construction, can, at least to some extent, be disruptive. While the decision to install a new roof should not be taken lightly, there are a number of major benefits you should take into consideration.

Safety

One major factor to consider is the increased safety provided by a new roofing system. As a roof ages, it’s ability to protect your home from the elements decreases over time. Water may begin to seep inside your home, allowing mold and mildew to grow, especially in areas such as an attic space or interior of the walls. Because this type of water damage often goes unnoticed for a long period of time, you and your loved ones could be at risk of serious health conditions as the mold spores circulate around your home, causing sickness and in some cases mold can even be fatal. The water damage can additionally damage the structural integrity of your home, cause the drywall to buckle, paint to peel, insulation to become damaged, and your roof could possibly even collapse.

Energy Efficiency

Thanks to constantly improving technology, today’s roofing materials are vastly different than those of only a few decades ago. Features such as enhanced heat reflection and better insulating factors mean your heating and cooling systems will not need to work as hard to keep your home in a comfortable temperature range, saving you money in reduced energy costs.

Curb Appeal

If you are considering putting your home on the market (and perhaps even if you are not) you should definitely take into account the benefits of a new roof to your hoe’s curb appeal. In addition to the aesthetic value, a new roof demonstrates that a homeowner has been diligent in caring for and maintaining the home. A sleek new roof can improve your home’s curb ppeal by as much as 40% – which can translate to an increased value and a quicker sale. A smart homeowner can also use this opportunity to add other appealing features, such as new windows or a skylight, which will brighten the home, making it more inviting and further decrease energy costs.

Return On Investment

Installation of a new roof can provide approximately 70% return on investment, making it an ideal home improvement project for a homeowner looking to sell or add lasting value to the home. Choose quality materials and experienced professional installers for a roof that will exceed expectations and outlive it’s warranty.

Uncategorized

Spring Time Roof Tips

Winter can be extremely hard on your roof. Cold and changing temperatures, wind, rain, or even snow and ice depending on where you live, can all combine to wreak havoc on your home. Ice dams, caused by build up of ice and snow, can cause water to not drain properly, pooling under flashing or penetrating your shingles and leading to severe water damage. If you haven’t been the victim of ice, snow or other harsh winter weather conditions, you may have been lulled into a false sense of security, however. Warm temperatures during the day and cold temperatures at night can cause rapid expansion and contraction that can damage roofing membranes and metal components. No matter where you live, you should do a thorough inspection of your roof’s condition to be sure to stay ahead of any needed repairs or corrections.

Here are some helpful insights into just how to go about giving your roof a spring touch up:

  • Trim tree limbs.
    • You should never allow tree limbs to touch your roof. The limbs can scrape the roof shingles and loosen the protective coating, shortening the life span of the roof.
  • Inspect the shingles.
    • Loose, missing, curling, peeling, or otherwise damaged shingles should be replaced immediately. Hammer down any nails that may have poked up. Remove debris such as leaves or pine needles – these can trap moisture and add weight to the roof, or cause mold and mildew to grow, which will eat away at the roofing material and ultimately cause leaks.
  • Check your gutters.
    • Clear away any debris such as leaves and pine needles. Spring rains will not be able to drain properly if your gutters are blocked by debris, and this can lead to water damage. Be sure the gutters are securely attached and sitting snugly along the roof line.
  • Look for damage.
    • Inspect the flashing for damage such as cracked caulking or rust spots. Examine the soffits (metal or wood panels along the underside of the roof between the wall of the house and the roof line) and fascia (metal or wood boards along the roof line or behind the eavestrough) for any soft spots, holes, or otherwise damaged parts. Look for damage around the chimney and vents.
  • Ensure there is no water damage.
    • Carefully check for signs of a leak inside the home as well as on the roof. A leaking roof can ruin insulation, ceilings, walls, even cause structural damage if left untreated.

If you notice any issues, or are unsure how best to proceed, it’s best to call in a professional. Many companies will offer free inspections, and the pros know what to look for – which means you will be far more likely to identify a problem before it becomes a disaster.


Uncategorized

What To Do When Your Roof Leaks

A leaking roof is something every homeowner dreads, and for good reason. While a small leak at some point in the home’s lifetime is to be expected as par for the course, they key factor is in how you handle the leak. It’s not just an inconvenience – if left unattended to, it can cause serious and substantial damage, or perhaps even cause injury to the structure’s inhabitants. The longer the problem is ignored, the more expansive the damage can become, potentially leading into a financial nightmare. Water rings may begin to appear on the ceiling, causing the paint to become discolored, or the plaster to warp and bubble. Additional damage may be done to adjacent walls. Furniture may be ruined. Insulation can be destroyed, causing inefficient heating and cooling resulting in higher energy bills, and even structural damage to the rafters, ceiling joists, wall framing, fascia boards and exterior trim may occur in extreme circumstances. Light fixtures and fans may become damaged, presenting a fire hazard , and mold (particularly black mold) and mildew can grow, leading to serious health concerns.

So, what should you do if you have discovered a leak? Well, the first step is in determining the cause of the leak, and this can be a tricky process. Often, the homeowner may assume the source of the leak is directly above the visible water source. Sadly, this is often not the case. The water may be running down the interior structures, or even be caused by condensation. In many cases, plumbing or air conditioning issues are the cause rather than a roof leak. You’ll need to do some sleuthing here to find the real source of the problem.

First, try to catch the leak in action – while it is raining or snowing. This is the most effective way to trace the water to it’s source, and far more reliable than tracing the stains themselves. If it’s not reasonable to wait for the weather to comply, you may choose to use a garden hose on the area you believe to be affected to confirm that the water enters the home from that location. The most common sources of a leaking roof are as follows:

  • Missing, damaged, or loose shingles, tiles or seams
  • Improper attic ventilation causing a buildup of condensation
  • Ice Dams preventing proper run off and forcing water to back up under shingles
  • Ponding water
  • Exposed nail heads
  • Skylight flashings
  • Wall step flashings
  • Plumbing vent flashings
  • Furnace or B-vent flashings
  • Wind driven rain
  • Built up debris
  • Chimneys

Rule out other causes, such as plumbing leaks, a/c leaks, condensation, or even pest infestation, to avoid unnecessary expense, then consult a professional. In some cases, you may need to make an emergency repair until the roofer is able to remedy the problem. Remove any items that may be further damaged, such as furniture, clothing, or other personal items during the interim.

While you can’t prevent all issues all the time, the best approach to caring for your roof is to have regular inspections performed by a qualified roofer, especially after a severe weather event such as a hail storm, heavy winds, or lightning. Be sure to keep gutters clear at all times, and remove branches that may damage your roof. With diligent maintenance and care, you can expect your roof to last a significant amount of time.


WAYNE'S ROOFING & SHEET METAL
Certified Roofing Contractors License Number: CCC054806

Contact Us

Hours: Weekdays 8:00 a.m -4:00 pm

1024 S. Nova Rd. Ormond Beach, FL 32174

Phone386-255-3633